


Do you ever wish you could just open your closet in the morning and pull out an entire coordinated outfit? Imagine deciding to dress “business casual,” and reaching in to retrieve a hanger holding a complete outfit — from neatly creased khakis, to shirt, shoes and accessories. Off to work you’d go, looking like a million bucks!
Okay, back to reality. What really happens is that you reach into your crowded closet for your black pants, think for a bit and then reach back in for a blue shirt. Next, you scramble around on the floor for acceptable shoes, then rifle for accessories to pull it all together. Ugh. Too many decisions — too much time wasted. Too long to get to your first cup of coffee.
You waste the same kind of time making unnecessary decisions when you manually apply formatting in Microsoft Word — bold, underline, italics, font size. But, unlike your uncooperative closet, Word will let you reach into the program to pull out and automatically apply formatting to your documents — that’s what Word’s Styles are all about.
Using Styles to Make Life Easier: Let’s Try It Out
At their most basic, Word’s Styles are a consistent set of formatting actions applied to document text with a single click. It’s really quite as simple as that, and not at all frightening. (Many people seem to shy away from using Styles because the functions don’t appear friendly — but they are.) In fact, every time you work on a Word document, you’re working with a Style — Word’s “Normal” Style, which determines the default font, font size, paragraph spacing and alignment and more. Normal Style is so easy to use, you likely don’t even know you’re using it!
To convince you how very simple Styles are to apply, I’d like to ask you to open a new, blank Word document.
Next, type a sentence, any sentence. (When I’m training someone, my go-to typed sentence is “Now is the time for all good people to come to the aid of their country” — give that one a try if you like.) Take a look at the sentence you just typed — whatever font and font size that’s showing is determined by Word’s default Normal Style.
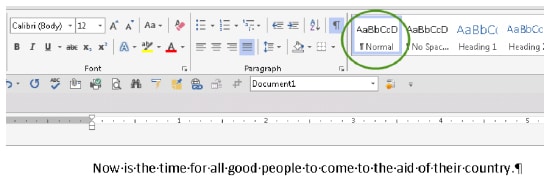
Now, you are going to change Normal Style to Heading 1 Style. To do that, place your cursor anywhere in the typed sentence. Look up at Word’s Ribbon; the Style portion of the Ribbon is toward the right side. (This assumes Word is showing the Ribbon’s Home tab — if not, change to the Home tab.)

Look through the Styles (see above) to find Heading 1 and click on it. You’ll see the sentence text automatically change from Normal Style to Heading 1 Style, with all Heading settings applied at once. No more one action at a time.
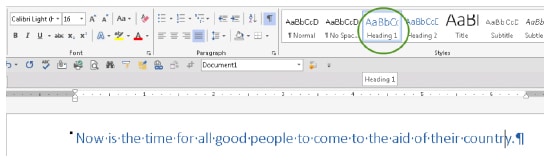
The screenshot below shows Word’s Heading 1 Style settings, to give you an idea of all the formatting changes made to the text when you apply that particular style.

Next, place your cursor at the end of the typed sentence, press Enter a couple of times, and then type another sentence — anything you’d like.
Place your cursor in the sentence again and find Word’s Heading 2 Style and click on it. Notice the automatic changes to the text.
Try this a few more times with additional sentences using additional Styles until you get a feel for how some of the various basic Styles look.
You’ve just styled your document text — and it really is that easy.
Some of the many benefits of working with Word’s Styles are these:
- Speed. One click — many changes all at once!
- Consistency. Everything styled as Heading 1 will always look like everything else styled as Heading 1, and so on (assuming you don’t change the default Style settings).
- Automation of some functions. This can include Tables of Contents and more.
For more practice, find an existing Word document with titled paragraphs that have been manually formatted. Make a copy of that document. (You would never want to experiment on the “real” document!) Now, go ahead and select the top-level paragraph headings and apply the Heading 1 Style to them. Continue to work through the document applying Heading 2 Style to subparagraphs, Heading 3 Style to sub-subparagraphs and so on.
Notice how quickly you can apply multiple formats, and how consistent the results are.
Now hold that thought (and save that document) until next month’s installment, when we’ll continue “Stylin’ It.”
A Note About Changing Default Styles
You may not like the default settings of Word’s various Styles. While you can change the settings of any particular Style to suit your personal preferences, here’s a note of caution: If you customize Word’s default Styles, you begin to run a risk of changing them so much that a recipient may not be able to see all your customizations (although this is unlikely in more current versions of Word). You run a bigger risk, though, of wasting your valuable time.
For what it’s worth, I see this kind of thing through this lens: Changing the default styles to something you find more visually appealing is a personal preference. It’s highly unlikely your client cares or even notices. As long as the document is expertly and substantively drafted and presented professionally, your client is not likely to find value in the time taken to change the Style to something you find more pleasing.